


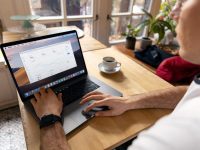


Want to start a new blog then we recommend you to create it on the CMS (Content Management System) Platform Tools like WordPress, Shopify, Joomla etc. By using these CMS tools, you can create any type of website (or) a blog including e-commerce store without any prior knowledge of coding. It’s a drag and drop designing tool to create your website easily at no time.
Tip: Before starting your website, you put your ideas on the paper and find out your niche. This is your first step to success
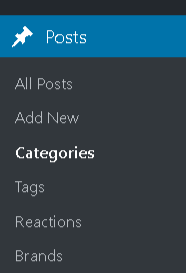
Steps To Create A WordPress Blog:
- After brainstorming, now you gotta know your niche right? Yes! based on your niche you need to buy a domain and hosting.
- After purchasing your domain and hosting, just login your cPanel account and install WordPress for your domain – the tool available on the section, called Softaculous, it is in the cPanel itself. At the time of your installation you will be able to create your Username & Password for your website.
- Now login your website with your credentials and install a new theme for your blog (It may be a Premium or a Freemium theme). The login URL looks like this: https://www.wordpress.com/wp-admin
- To install your theme just hover on the appearance section & find out your favorite and suitable free themes – tons of free themes are available on the WordPress. Now you need to install and activate required plugins for your blog. The theme itself ask you to install necessary plugins so, go for it. We can find tons of free plugins as well on the plugins section so! you can search and install by clicking on the Add New option. Make sure that the plugins should be tested and compatible to your theme, otherwise you may face some fatal errors for sure but you will see an option whether it is tested or not. Untested plugins will also work fine for some themes, the actual meaning for untested means – they have not submitted all the documents and other required things to the plugin’s marketplace, so, that’s the reason, it is showing untested but for our sake we can use tested plugins.
- Another important aspect on WordPress is a Security, to secure your site from hackers and bad bots you must install security plugins – Priority task.
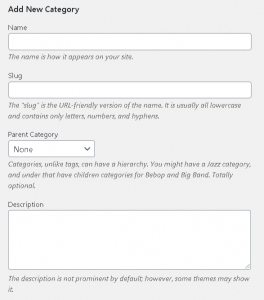
- After designing your site, the next big thing is to set up your menu – hover on appearance section. So, before going to setup your menu you need to create required categories for your blog, as we know categories plays a major role on creating structured data and user friendly site, generally google bots like structured data and user friendly websites. To setup your categories- Click Posts -Click Categories- Add New Category. You can add unlimited categories for your blog. You can also create child category; it is nothing but a new category. If you want to allocate child category to your parent >> click Parent Category drop-down box as shown below and select your parent.
- Now you need to add some basic pages to your website – Home, About, Services, Contact Us, Privacy Policy. To create pages Go To – Pages – Click Add New
- Now, setup your menu- Go To Appearance – Click Menu – Create New Menu. Now add items to your menu, it may be a post, category or a page. On the left hand side you will see an option called “Add Menu Items” where you can access all posts, pages and categories & simply drag and drop your suitable elements to your menu. To create a sub-menu you just hold it, drag it and leave your item slightly towards right.
Basic Plugins To Install:
Checkout some basic plugins for your website or a blog.
- Contact Form 7 By Takayuki Miyoshi
- ReCaptcha v2 For Contact Form 7 By IQComputing // For Captcha
- Image Widget By Modern Tribe, Inc.
- WP Cerber Security By Cerber Tech Inc. // For Security
- WP Fastest Cache By Emre Vona // To Increase Your Website Speed
- Blackhole By Jeff Starr // For Bad Bots
- WP Tao By WP Tao Co. // Best Plugin To Track Your Website Visitors
Now you got the primary menu. Now, you can arrange your footer for your blog. It’s better to add google analytics and tracking codes on the footer because it is common to all the pages. Go To Appearance Section – Click Widgets – Now Arrange your footer, sidebars etc. by adding your Quick links, Images, Logo, Post Tags, Location, Contact Details & Copy Right Text.
Now finish your site by adding content to it.
For better indexing you can optimize your article with the help of an SEO guy (or) you can follow the given link and do it for yourself 10 White Hat SEO Techniques You Must Follow Before You Publish The Article!
How To Schedule Your Articles for your blog?
Posting regular quality articles will boost your rankings faster but to beat the competition you have to learn Search Engine Optimization techniques. If you are new to the blogging then subscribing to the Digital Ziksa Community Journal will helps you to learn digital concepts thoroughly.
- Make your own timeline to post your articles. Save it as a draft, you can save your time rather than saving it on your computer. Don’t forget time is money.
- Digital Ziksa suggest you to schedule your articles on Monday, Wednesday & Saturday (or) you can choose your own timings to post your stuff. Don’t be a lazy fox!
- Utilize that gap, by sharing your articles on the social media platforms & optimize each article.
- Writing an article is really a great thing but designing a featured image is also an important factor for you to attract internet users. Remember one thing, the title and the picture will brings you more conversions. You can design any image by using these free graphic designing tools.
- For every blog post you must add related tags as it is important for ranking purpose. Google sometimes will pull those tags as keywords so don’t miss to add tags for your blog post, tags are unlimited but use 3 to 4 tags for each article.
How To Change Blog Post Visibility?
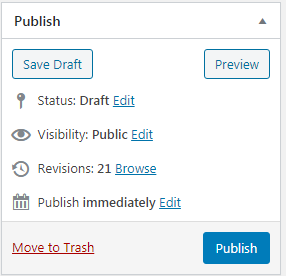
You can change your visibility of your blog posts individually, sound’s good? Ya! by default writing section is on the Public mode and if you want to protect your article you may change it to Private (or) Protected. On the right hand side of the editor – Go To Publish Button Section – Find Visibility Option – Click On Edit – Change according to your preference.
Private WordPress Blog Post: Only logged-In users can have a permission to access the content. It will lock unauthorized users of that content.
Protected WordPress Blog Post: You can lock your blog post by giving a password to it. Users who have a password can access the content and it is mostly used for membership sites. You can provide passwords to the paid members.
Here are some niche’s you might get some idea.
- Mother & Kid
- Technology Q & A
- Blogging Tips
- Affiliate Marketing
- Startup Ideas
- Consultant
- Product Reviews
- Health Tips
- Movie Updates
If you want to suggest any niche please drop it on the comment section below will update it on the list. Finally, when we talk about a blog write your article and hit publish to go live. You can also schedule your post at any time – On the Publish Module – Hover On The Publish Immediately – Click On Edit – Set your time. That’s it!
Hope you got some idea! Keep Reading!
0 Comments